> ## Documentation Index
> Fetch the complete documentation index at: https://germeytechnology-docs-remove-4o-image-nav.mintlify.site/llms.txt
> Use this file to discover all available pages before exploring further.
# OpenAI Images Edits API 신청 및 사용
> OpenAI generation 集成指南 - Ace Data Cloud
OpenAI 이미지 편집 서비스는 여러 장의 이미지와 지시문을 입력받아 수정된 이미지를 출력합니다. 현재 인터페이스는 `dall-e-2`, `gpt-image-1`, 최신 **`gpt-image-2`** 모델과 동일한 인터페이스로 접속 가능한 **`nano-banana` / `nano-banana-2` / `nano-banana-pro`** 시리즈 모델을 지원합니다.
본 문서는 OpenAI Images Edits API 사용 절차를 소개하며, 이를 통해 공식 OpenAI 이미지 편집 기능을 쉽게 활용할 수 있습니다.
## 신청 절차
OpenAI Images Edits API를 사용하려면 먼저 [OpenAI Images Edits API](https://platform.acedata.cloud/documents/openai-images-edits) 페이지에서 「Acquire」 버튼을 클릭하여 요청에 필요한 인증 토큰을 획득하세요:

로그인 또는 회원가입이 되어 있지 않으면 자동으로 로그인 페이지로 이동하여 가입 및 로그인을 안내합니다. 로그인 후 자동으로 현재 페이지로 돌아옵니다.
최초 신청 시 무료 크레딧이 제공되어 API를 무료로 사용할 수 있습니다.
## GPT-Image-2 모델
`gpt-image-2`는 이미지 편집 시 `gpt-image-1` 대비 다음과 같은 뚜렷한 향상을 보입니다:
* **구조 안정성 향상**: 스킨 변경, 색상 변경, 배경 변경 시 원본 이미지의 레이아웃과 구도가 거의 훼손되지 않습니다.
* **문자 보존 정확도 향상**: 인포그래픽, 포스터, 메뉴 등 텍스트가 포함된 이미지 편집 후에도 텍스트가 선명하게 읽힙니다.
* **URL 직접 전송 지원**: 기존의 `multipart/form-data` 파일 업로드 외에, `gpt-image-2`는 **JSON 방식으로 이미지 URL을 직접 전달하는 것도 지원**하여, 이미지를 로컬에 다운로드하지 않고도 서버 파이프라인에 적합합니다.
* **고해상도 재생성 지원**: 1K 원본 이미지를 입력하고 `size` 파라미터로 2K / 4K 출력을 요청할 수 있으며, 편집 과정에서 동시에 확대가 이루어집니다.
### 지원하는 `size` 값
편집 인터페이스의 `size` 제약은 생성 인터페이스와 동일하며, `gpt-image-2`는 `size`가 `auto`, 비어있거나 `WIDTHxHEIGHT` 형식이어야 합니다. 그 외의 형식은 400 오류를 반환합니다. **모든 해상도(1K / 2K / 4K / 커스텀)는 단일 이미지당 동일 요금이 부과되며, 원본 해상도나 `size` 요청값과 무관합니다.**
상위 시스템의 커스텀 해상도 제약도 동일하게 적용됩니다: 너비와 높이는 모두 16의 배수, 긴 변 ≤ 3840, 총 픽셀 수 ≤ 8,294,400.
| 비율 | 1K 권장 | 2K 권장 | 4K 권장 |
| ---- | ----------- | ----------- | ----------- |
| 1:1 | `1024x1024` | `2048x2048` | `2880x2880` |
| 4:3 | `1536x1024` | `2048x1536` | `3264x2448` |
| 3:4 | `1024x1536` | `1536x2048` | `2448x3264` |
| 16:9 | `1792x1024` | `2048x1152` | `3840x2160` |
| 9:16 | `1024x1792` | `1152x2048` | `2160x3840` |
> 예: 원본 이미지가 `1024x1024`일 때, `size`에 `2048x2048`을 전달하면 모델이 편집 지시에 따라 2K 이미지를 재생성하여 출력합니다. `3840x2160`을 전달하면 4K 가로 화면 이미지가 출력됩니다. `auto` 또는 생략 시 모델이 자동으로 선택합니다. 세 경우 모두 요금은 동일합니다.
> **`n` 파라미터 관련**
>
> `gpt-image-2` 편집 인터페이스는 현재 **`n > 1`을 지원하지 않습니다**. 이 파라미터는 무시되며, `n=1`이든 `n=10`이든 단일 요청당 1장만 반환되고 1장에 대해서만 요금이 부과됩니다. 여러 후보 편집 결과를 한 번에 받고 싶다면 **여러 번 병렬로 요청을 보내야 합니다**. 이 제한은 `gpt-image-1` / `gpt-image-1.5`, `nano-banana` / `nano-banana-2` / `nano-banana-pro` 시리즈에도 동일하게 적용됩니다. `dall-e-2`만이 현재 유일하게 `n > 1`을 네이티브로 지원하는 편집 모델입니다.
아래는 서로 다른 두 실제 예제로 `gpt-image-2`의 편집 능력을 확인해봅니다.
### 호출 방식 1: JSON + 이미지 URL (추천)
`application/json` 방식으로 요청을 보내고, `image` 필드에 이미지 URL을 넣으면 모델이 해당 이미지를 가져와 `prompt`에 따라 편집합니다.
예를 들어, 아래 원본 이미지는 `gpt-image-2`로 생성한 과학 정보 그래픽입니다:
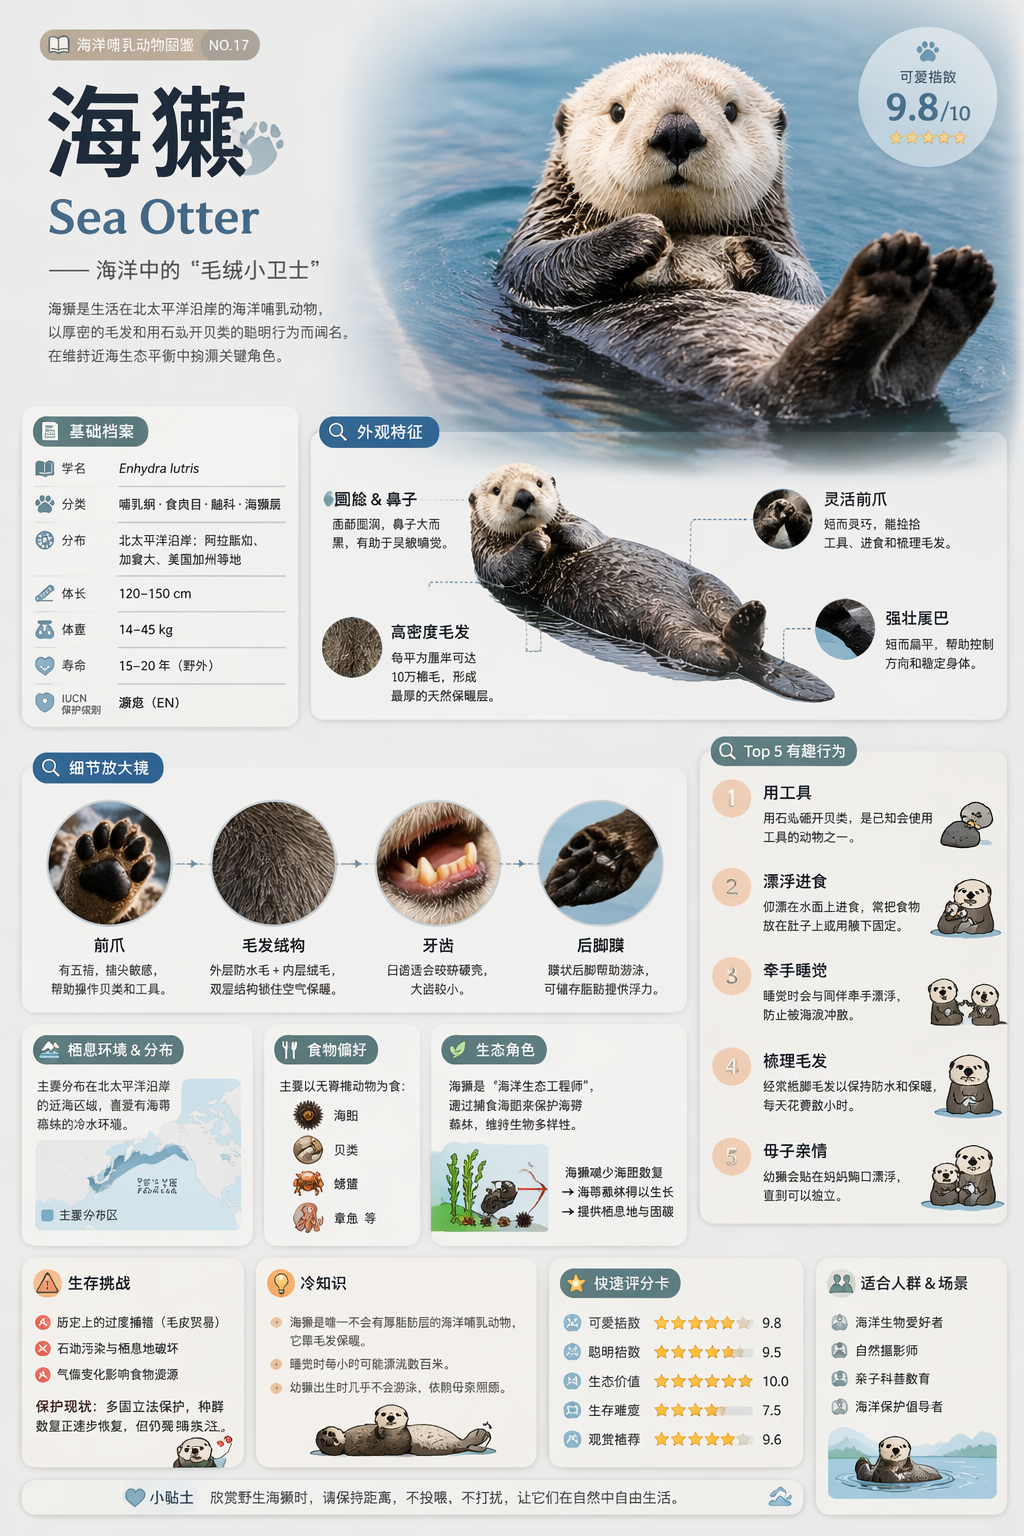
이를 “야간 모드” 색상으로 변경하고 싶다면 다음과 같이 호출합니다:
```shell theme={null}
curl -X POST "https://api.acedata.cloud/openai/images/edits" \
-H "Authorization: Bearer {token}" \
-H "Content-Type: application/json" \
-d '{
"model": "gpt-image-2",
"image": "https://platform.cdn.acedata.cloud/gpt-image/5c9fa635-8794-4c6d-88f8-584d7f4716c6_0.png",
"prompt": "Convert this infographic to dark mode: dark navy background, light cream text, deep gray rounded module cards with soft shadows. Keep all layout, structure, and module arrangement identical — only invert the color scheme.",
"size": "1024x1536"
}'
```
또는 Python으로:
```python theme={null}
import requests
url = "https://api.acedata.cloud/openai/images/edits"
headers = {
"accept": "application/json",
"authorization": "Bearer {token}",
"content-type": "application/json"
}
payload = {
"model": "gpt-image-2",
"image": "https://platform.cdn.acedata.cloud/gpt-image/5c9fa635-8794-4c6d-88f8-584d7f4716c6_0.png",
"prompt": "Convert this infographic to dark mode: dark navy background, light cream text, deep gray rounded module cards with soft shadows. Keep all layout, structure, and module arrangement identical — only invert the color scheme.",
"size": "1024x1536"
}
response = requests.post(url, json=payload, headers=headers)
print(response.text)
```
반환 결과는 다음과 같습니다:
```json theme={null}
{
"success": true,
"task_id": "cb104e35-af1f-45be-9fac-b62e2b256753",
"trace_id": "3e5c77c6-6c2e-4bba-a42d-98ea049b58a8",
"created": 1777048863,
"data": [
{
"revised_prompt": "Convert this infographic to dark mode: dark navy background, light cream text, deep gray rounded module cards with soft shadows. Keep all layout, structure, and module arrangement identical — only invert the color scheme.",
"url": "https://platform.cdn.acedata.cloud/gpt-image/cb104e35-af1f-45be-9fac-b62e2b256753_0.png"
}
],
"elapsed": 83.859
}
```
편집된 이미지는 다음과 같습니다:
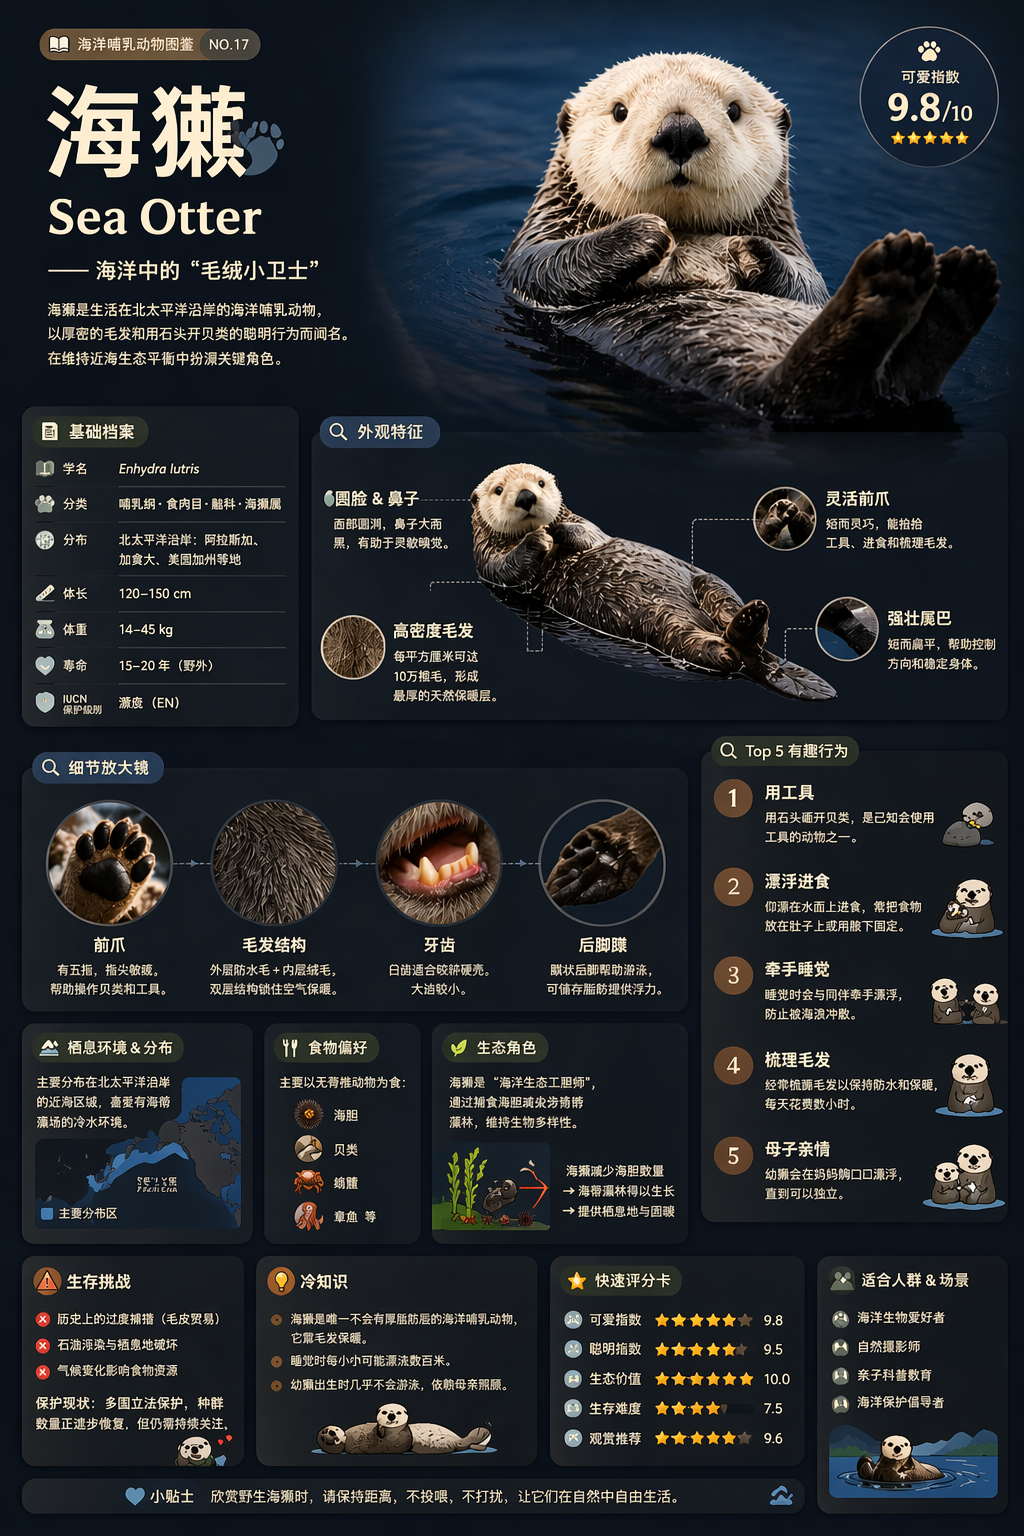
모듈 구조, 정보 구역, 글꼴 배치가 엄격히 보존되고 색상만 다크 테마로 반전된 것을 확인할 수 있습니다.
> **팁**: `image` 필드는 배열도 지원합니다. 예를 들어 `"image": ["url1", "url2", "url3"]`와 같이 최대 16장까지 참고 이미지를 동시에 전달하여 모델이 여러 이미지를 종합해 편집할 수 있습니다.
### 호출 방식 2: JSON + 다중 참고 이미지
`gpt-image-2`는 여러 이미지를 참고하여 최종 결과를 생성할 수 있습니다. 예를 들어 여러 제품 사진을 하나의 선물 바구니에 합성하는 경우:
```python theme={null}
payload = {
"model": "gpt-image-2",
"image": [
"https://example.com/item1.png",
"https://example.com/item2.png",
"https://example.com/item3.png"
],
"prompt": "Combine all the items above into a single 'Relax & Unwind' gift basket on a clean white background, photorealistic, soft natural lighting.",
"size": "1024x1024"
}
```
### 사용 예시: 스타일 변경 + 구조 유지
다음은 나무 책장을 현대적인 플로팅 선반으로 교체하되, 각 층의 책 수량과 배열은 엄격히 유지하는 예입니다.
원본 이미지 (`gpt-image-2`로 생성한 나무 책장):
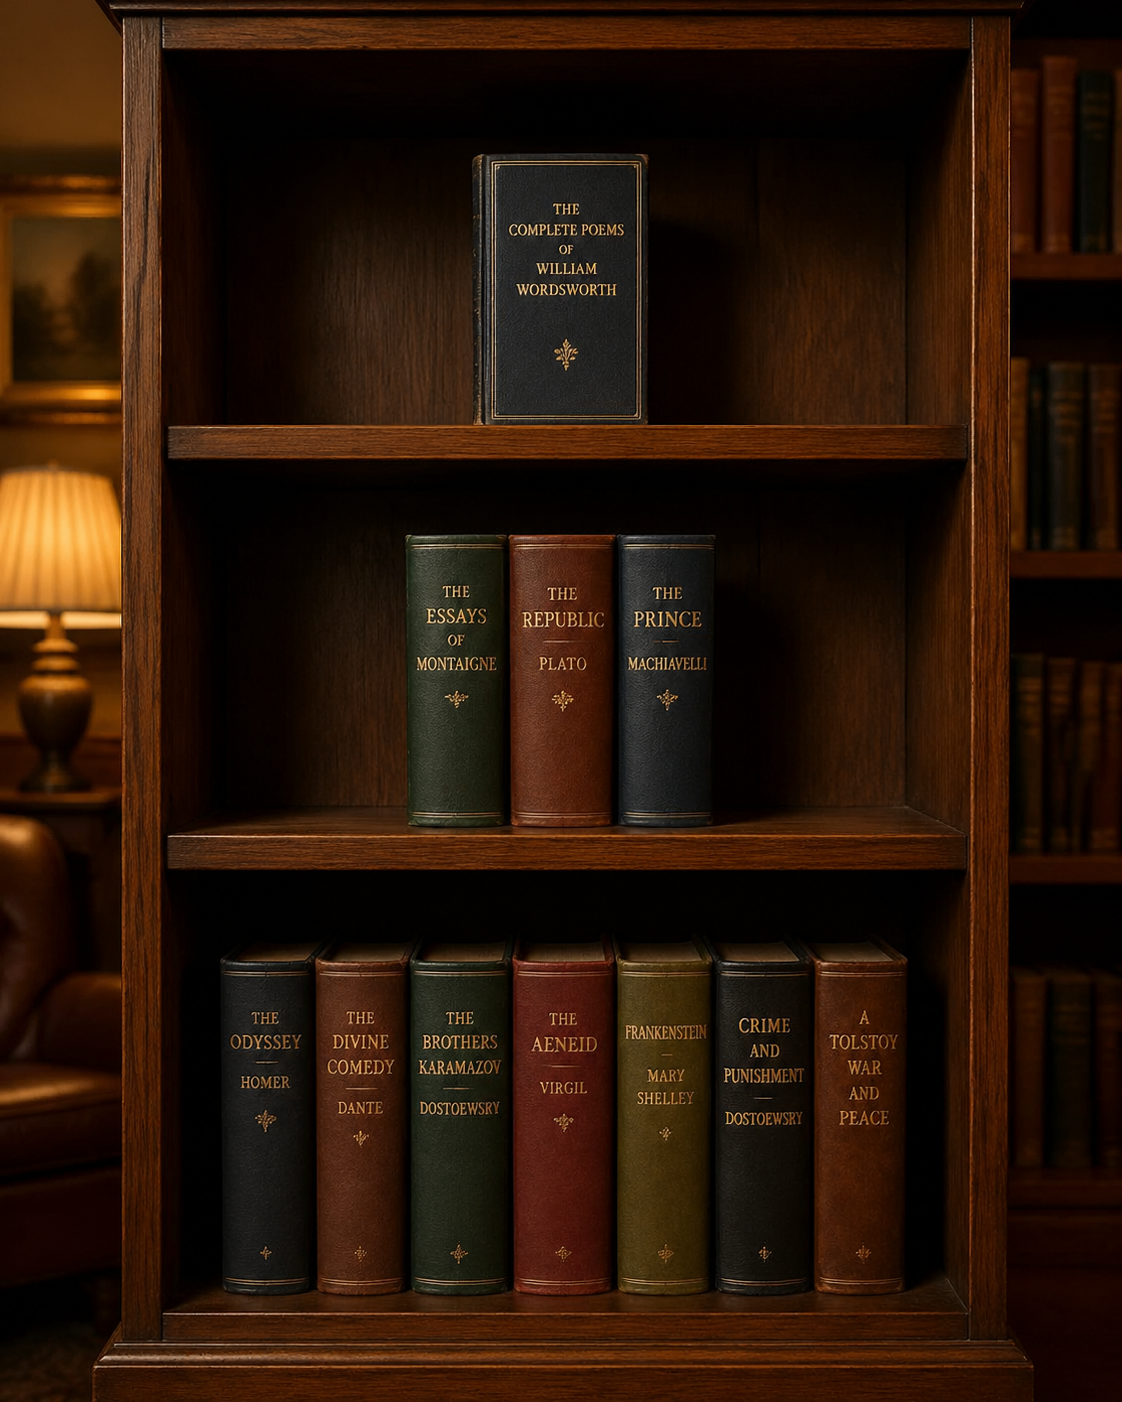
호출 예:
```python theme={null}
payload = {
"model": "gpt-image-2",
"image": "https://platform.cdn.acedata.cloud/gpt-image/141970f0-65fb-4ec8-ab7d-9be173641350_0.png",
"prompt": "Replace the wooden bookshelf with a sleek modern white floating shelf mounted on a pastel blue wall. Keep the exact same arrangement of books (1 book on top, 3 in middle, 7 on bottom). Add a small potted succulent on the top shelf next to the book. Bright airy daylight from the left.",
"size": "1024x1024"
}
```
편집 결과 (`task_id`: `e9544dba-727e-44a2-81e1-223d49869380`):

스타일과 환경은 지시문대로 완전히 교체되었으나, 각 층의 책 수량(1 / 3 / 7)은 엄격히 유지되었고, 요구대로 작은 다육식물이 추가되었습니다.
### 호출 방식 3: multipart/form-data (OpenAI SDK 호환)
공식 OpenAI Python SDK를 사용 중이라면 기존의 `multipart/form-data` 업로드 방식도 동일하게 적용 가능하며, `model`만 `gpt-image-2`로 변경하면 됩니다:
```python theme={null}
import base64
from openai import OpenAI
client = OpenAI()
result = client.images.edit(
model="gpt-image-2",
image=[open("test.png", "rb")],
prompt="Convert this image to dark mode while keeping the layout intact."
)
image_base64 = result.data[0].b64_json
image_bytes = base64.b64decode(image_base64)
with open("edited.png", "wb") as f:
f.write(image_bytes)
```
SDK 사용 시 환경 변수 두 개를 먼저 설정해야 합니다. `OPENAI_BASE_URL`은 `https://api.acedata.cloud/openai`로, `OPENAI_API_KEY`는 발급받은 토큰으로 설정하세요:
```shell theme={null}
export OPENAI_BASE_URL=https://api.acedata.cloud/openai
export OPENAI_API_KEY={token}
```
## Nano Banana 시리즈 모델
`nano-banana` 시리즈도 편집 시나리오에서 `/openai/images/edits`를 통해 접속하며, `model`을 아래 표 중 하나로 변경하면 됩니다.
| 모델 | 요금 (크레딧 / 회) | 적용 시나리오 |
| ----------------- | ------------ | ------------------------ |
| `nano-banana` | 0.14 | 일반 이미지 편집, 가장 빠르고 저렴 |
| `nano-banana-2` | 0.28 | 품질 및 디테일 향상 |
| `nano-banana-pro` | 0.35 | 시리즈 최고급, 구조·문자·스타일 보존 최상 |
> **중요: 지원 파라미터 범위**
>
> Nano Banana는 어댑터 레이어를 통해 OpenAI 프로토콜에 접속하며, 다음 파라미터만 지원합니다: `model`, `prompt`, `image`.
>
> * `image`는 `multipart/form-data`로 파일 업로드 가능하며(내부에서 `data:;base64,...`로 변환 후 상위 시스템에 전달), 또는 폼 필드에 이미지 URL 문자열로 직접 전달할 수 있습니다.
> * `mask`, `n`, `size`, `response_format` 등은 지원하지 않으며, 입력해도 무시됩니다.
> * 반환 구조는 OpenAI 형식을 따르나(`data[].url`), `created`는 항상 `0`이며, `b64_json`은 반환하지 않고 `revised_prompt`는 원본 `prompt`와 동일합니다.
### 폼 + 이미지 URL 호출 예
```shell theme={null}
curl -X POST "https://api.acedata.cloud/openai/images/edits" \
-H "Authorization: Bearer {token}" \
-F "model=nano-banana" \
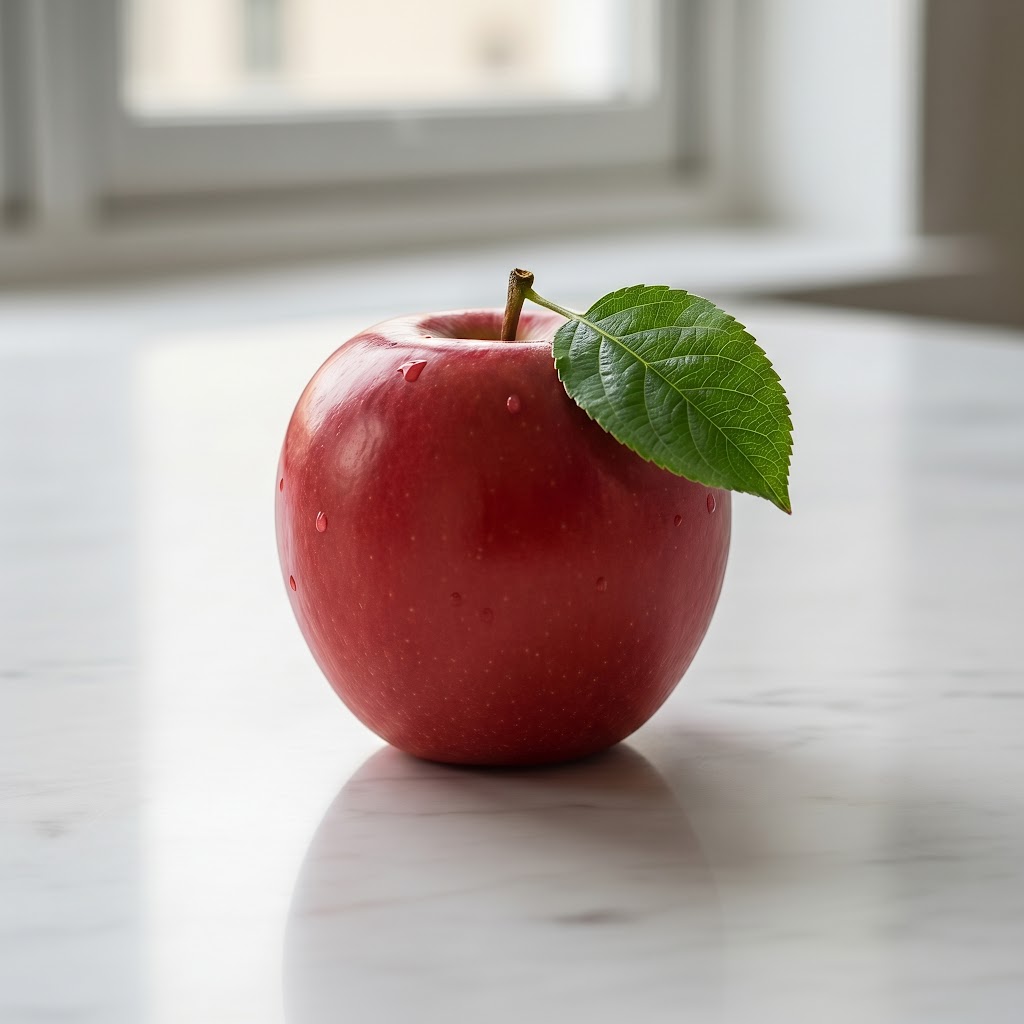
-F "prompt=add a green leaf on top of the apple" \
-F "image=https://platform.cdn.acedata.cloud/nanobanana/6870b330-65c4-436c-bb80-819fdae7a7a4.png"
```
반환 결과:
```json theme={null}
{
"created": 0,
"data": [
{
"url": "https://platform.cdn.acedata.cloud/nanobanana/311e95b6-5eb1-4c4a-8ee6-0cb03ee44f61.jpeg",
"revised_prompt": "add a green leaf on top of the apple"
}
]
}
```
편집된 이미지:
### 폼 + 로컬 파일 호출 예
```python theme={null}
import requests
url = "https://api.acedata.cloud/openai/images/edits"
headers = {
"authorization": "Bearer {token}"
}
files = {
"image": open("apple.png", "rb"),
}
data = {
"model": "nano-banana-pro",
"prompt": "add a green leaf on top of the apple"
}
response = requests.post(url, headers=headers, files=files, data=data)
print(response.text)
```
### 비동기 콜백
`callback_url` 비동기 콜백 메커니즘은 nano-banana에도 동일하게 적용되며, 호출 절차는 다른 모델과 완전히 동일합니다. 자세한 내용은 아래 [비동기 콜백](#비동기-콜백) 섹션을 참고하세요.
## 기본 사용법
이제 코드를 통해 호출할 수 있습니다. 아래는 CURL 예제입니다:
```curl theme={null}
curl -s -D >(grep -i x-request-id >&2) \
-o >(jq -r '.data[0].b64_json' | base64 --decode > gift-basket.png) \
-X POST "https://api.acedata.cloud/v1/images/edits" \
-H "Authorization: Bearer {token}" \
-F "model=gpt-image-1" \
-F "image[]=@test.png" \
-F 'prompt=Create a lovely gift basket with these this items in it'
```
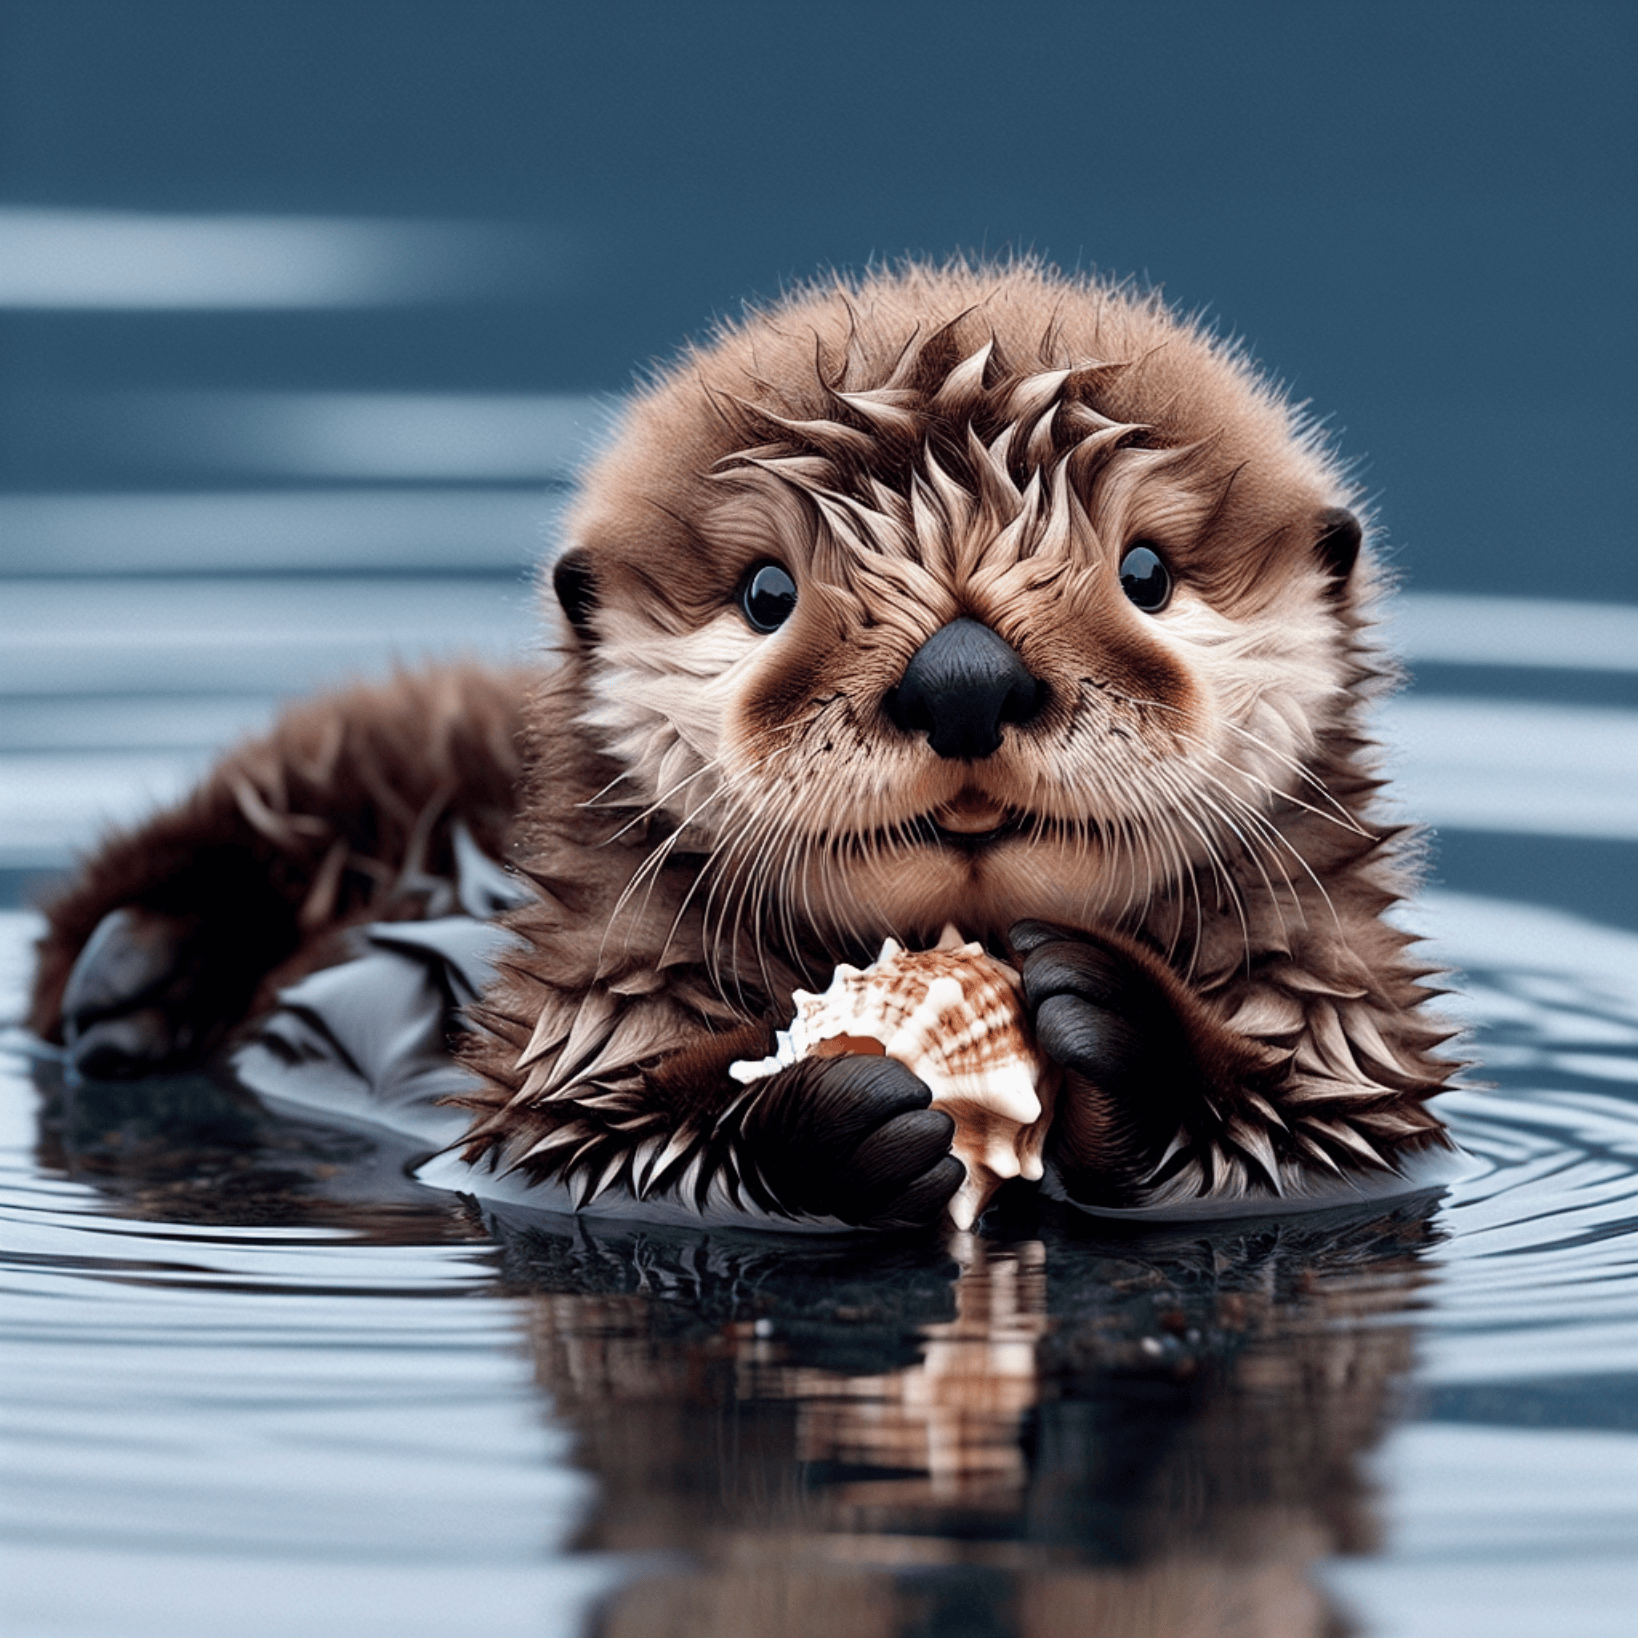
처음 이 인터페이스를 사용할 때는 최소 네 가지를 입력해야 합니다. 하나는 `authorization`으로, 드롭다운 목록에서 선택할 수 있습니다. 또 하나는 `model`로, OpenAI 공식 모델 종류를 선택하는 파라미터입니다. 여기서는 1종류 모델을 주로 사용하며, 자세한 내용은 제공된 모델 정보를 참고하세요. 세 번째는 `prompt`로, 생성할 이미지에 대한 텍스트 지시문입니다. 마지막은 `image`로, 편집할 이미지 경로를 지정합니다. 아래 그림과 같은 이미지입니다:
동일한 호출 효과의 Python 예제 코드:
```python theme={null}
import base64
from openai import OpenAI
client = OpenAI()
prompt = """
Generate a photorealistic image of a gift basket on a white background
labeled 'Relax & Unwind' with a ribbon and handwriting-like font,
containing all the items in the reference pictures.
"""
result = client.images.edit(
model="gpt-image-1",
image=[
open("test.png", "rb")
],
prompt=prompt
)
image_base64 = result.data[0].b64_json
image_bytes = base64.b64decode(image_base64)
# 이미지 파일로 저장
with open("gift-basket.png", "wb") as f:
f.write(image_bytes)
```
Python 호출 시 두 개의 환경 변수를 먼저 설정해야 합니다. `OPENAI_BASE_URL`은 `https://api.acedata.cloud/openai`로, `OPENAI_API_KEY`는 `authorization`에서 받은 토큰으로 설정하세요. macOS에서는 다음 명령어로 환경 변수를 설정할 수 있습니다:
```shell theme={null}
export OPENAI_BASE_URL=https://api.acedata.cloud/openai
export OPENAI_API_KEY={token}
```
호출 후 현재 디렉터리에 `gift-basket.png` 이미지가 생성됩니다. 결과는 다음과 같습니다:

이로써 이미지 편집 작업이 완료되었습니다. 현재 Edits 인터페이스는 세 가지 모델을 지원합니다: `dall-e-2`, `gpt-image-1`, `gpt-image-2`이며, 그중 `gpt-image-2`가 권장 모델입니다. 자세한 내용은 위 [GPT-Image-2 모델](#gpt-image-2-모델) 섹션을 참고하세요.
## 비동기 콜백
OpenAI Images Edits API의 이미지 편집은 시간이 다소 소요될 수 있어, API가 장시간 응답하지 않으면 HTTP 요청이 연결 상태를 유지하여 시스템 자원이 낭비될 수 있습니다. 이를 위해 본 API는 비동기 콜백을 지원합니다.
전체 흐름은 다음과 같습니다: 클라이언트가 요청 시 `callback_url` 필드를 추가로 지정하면, API는 즉시 `task_id`를 포함한 응답을 반환합니다. 작업이 완료되면 편집 결과가 POST JSON 형태로 클라이언트가 지정한 `callback_url`로 전송되며, 이때도 `task_id`가 포함되어 작업 결과를 ID로 연동할 수 있습니다.
아래 예제로 구체적인 사용법을 살펴봅니다.
우선 Webhook 콜백은 HTTP 요청을 받을 수 있는 서비스여야 하며, 개발자는 자신이 구축한 HTTP 서버 URL로 교체해야 합니다. 여기서는 시연을 위해 공개 Webhook 사이트 [https://webhook.site/를](https://webhook.site/를) 사용합니다. 사이트에 접속하면 Webhook URL을 얻을 수 있습니다:
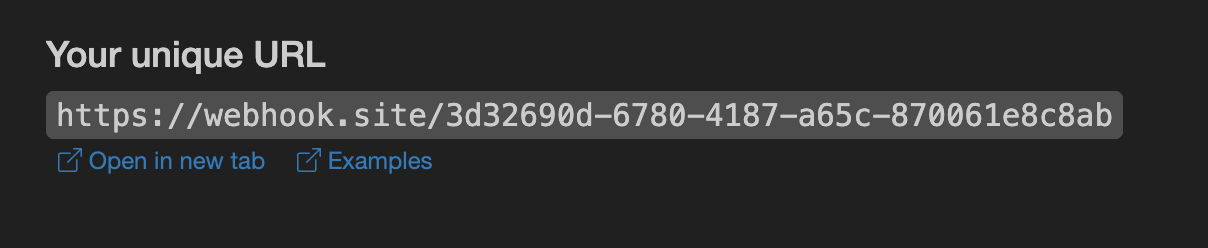
이 URL을 복사하여 Webhook으로 사용합니다. 예시 URL은 `https://webhook.site/3d32690d-6780-4187-a65c-870061e8c8ab`입니다.
다음으로 `callback_url` 필드를 위 Webhook URL로 설정하고, 다른 파라미터와 함께 요청을 보냅니다:
```shell theme={null}
curl -X POST "https://api.acedata.cloud/v1/images/edits" \
-H "Authorization: Bearer {token}" \
-F "model=gpt-image-1" \
-F "image[]=@test.png" \
-F "prompt=Create a lovely gift basket with these items in it" \
-F "callback_url=https://webhook.site/3d32690d-6780-4187-a65c-870061e8c8ab"
```
호출 후 즉시 다음과 같은 응답을 받습니다:
```json theme={null}
{
"task_id": "6a97bf49-df50-4129-9e46-119aa9fca73c"
}
```
잠시 후 Webhook URL에서 편집 결과를 확인할 수 있습니다:
```json theme={null}
{
"success": true,
"task_id": "6a97bf49-df50-4129-9e46-119aa9fca73c",
"trace_id": "9b4b1ff3-90f2-470f-b082-1061ec2948cc",
"data": {
"created": 1721626477,
"data": [
{
"b64_json": "iVBORw0KGgo..."
}
]
}
}
```
결과에 `task_id` 필드가 포함되어 있고, `data` 필드에는 동기 호출과 동일한 이미지 편집 결과가 포함되어 있습니다. `task_id`를 통해 작업을 연동할 수 있습니다.
## 오류 처리
API 호출 중 오류가 발생하면, API는 해당 오류 코드와 메시지를 반환합니다. 예를 들어:
* `400 token_mismatched`: 잘못된 요청, 파라미터 누락 또는 잘못됨.
* `400 api_not_implemented`: 잘못된 요청, 파라미터 누락 또는 잘못됨.
* `401 invalid_token`: 인증 실패, 토큰이 없거나 유효하지 않음.
* `429 too_many_requests`: 요청 과다, 속도 제한 초과.
* `500 api_error`: 서버 내부 오류.
### 오류 응답 예시
```json theme={null}
{
"success": false,
"error": {
"code": "api_error",
"message": "fetch failed"
},
"trace_id": "2cf86e86-22a4-46e1-ac2f-032c0f2a4e89"
}
```
## 결론
본 문서를 통해 OpenAI Images Edits API를 사용하여 공식 OpenAI 이미지 편집 기능을 손쉽게 활용하는 방법을 익혔습니다. 본 문서가 API 연동 및 사용에 도움이 되길 바라며, 궁금한 점이 있으면 언제든지 기술 지원팀에 문의하시기 바랍니다.